 creating dynamic web project" width="660" />
Apache Struts 2 is an open-source web application framework for developing Java EE web applications. It uses and extends the Java Servlet API to encourage developers to adopt a model–view–controller architecture. In this article, we will see how we can create a login page with validations using Struts 2. We will use struts UI tags to create a login page.
Before creating your Struts2 project it is important to make sure that you have the Apache Tomcat server installed and configured with the IDE of your choice like Eclipse. Now, if the above conditions are fulfilled then follow all the steps given below. We are going to use Eclipse IDE so that all the required components will be created under a Dynamic Web Project. Let us now start with creating Dynamic Web Project.
First, you simply need to start your Eclipse IDE and create a new Dynamic Web Project project. To do this go to File > New > Dynamic Web Project and enter the project name as per your wish. I have named it “struts_validation”
creating dynamic web project" width="660" />
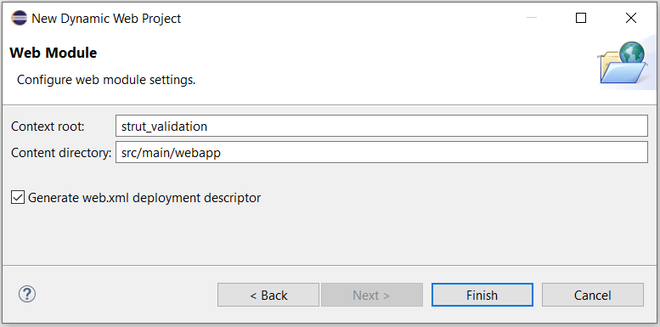
Set the rest of the options as given in the following screen
 creating dynamic web project" width="775" />
Select all the default options on the next screens and don’t forget to check the Generate web.xml deployment descriptor option
This will create a dynamic web project for you in Eclipse.
Now to run the Struts2 application, you need to set up your Struts2 framework.

struts-2.5.30 directory structure
Now copy all the files from the struts-2.2.3\lib folder to your project’s WEB-INF\lib folder. You can do this by simply dragging and dropping all the files into the WEB-INF\lib folder. Your project structure should now look like this

Create a web.xml file under the webapp/WEB-INF folder and copy the following code in web.xml.